Saturday, August 18, 2018

The Wall of Ancestors and Buttons, Two Solo Shows at USC-Aiken

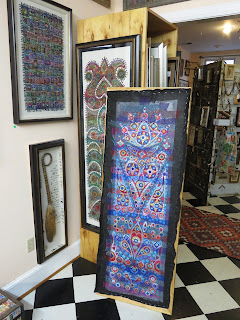
 (Above:  The Wall of Ancestors, a solo show at USC-Aiken. Click on any image to enlarge.)

Yesterday was grand! I got to tackle another gigantic space with The Wall of Ancestors. This show is inside the Etherredge Art Center on the University of South Carolina-Aiken's campus.  I brought all 275+ framed images, placed several of the largest ones in the center of the four large sections, and started arranging enormous vignettes.  There are twenty-two 8' x 4' panels along this wall.  That's a total of 88 linear feet.  It took six hours to unload into the elevator, haul the work to the space, and hang everything.  Yet, this is what I imagined back in 2014 when my obsession started.  (I blogged at The Wall of Ancestors HERE ... when there were only 127 total pieces).  I knew I wanted to have more pieces, more work from which to select, and not have to hang every single one!
     
 (Above:  Buttons!, my other solo show hanging in the lower level of the Etherredge Art Center.)

I didn't hang my other solo show, Buttons!  Ann Bliss, the gallery director, hung the twenty-three pieces in this simultaneously running exhibit.  This wall is on the lower level of the Etherredge Art Center.  It consists of thirteen 4' x 8' panels for a total of fifty-two linear feet.  It is also the first time I've mounted my button inspired work. 

 (Above:  Most of the first section of The Wall of Ancestors.  The total number of framed photos in this section is seventy-seven.)

Hopefully, lots of people will see the shows.  This weekend is student orientation.  The place should be crowded.  I came home with a total of thirty-one pieces that didn't find a place on the wall.  If I counted correctly, 246 pieces were hung.  It is nice to have "more than enough".  It makes the job of composing a nice arrangement so much easier. 

 (Above:  The second section of The Wall of Ancestors.  There are forty-five framed pieces.)

The press release covers both exhibits, but the paragraph on The Wall of Ancestors reads:

The Wall of Ancestors, a collection of anonymous photographs, is the centerpiece of Susan's larger installation, Anonymous Ancestors. Each image has been altered with letters clipped from vintage ephemera. The selected phrases suggest a fictional narrative. An image of an early 20th century infant propped up on a fancy wicker chair reads, "I didn't live to adulthood". Another snapshot of a feisty bathing beauty reads, "I never wore a seat belt". A couple staring blankly out of their antique frame has the caption "Virgins on our Honeymoon Night". There's "Pillar of the Community" and "Spinster Sisters" and "Home Sweet Home: Address Unknown". There are over two-hundred individual works in Lenz's collection. Together, these closely hung, framed works encourage viewers' minds to wander, envisioning forgotten friends, past holidays, ancient occasions, former cars, and hilarious fashion trends.

 (Above:  The third section of The Wall of Ancestors.  There are thirty-nine framed pictures.)

The press release paragraphs for Buttons! reads:

Buttons! is a brand new exhibition. The mixed media work is Lenz's response to an art administrator's harsh criticism of her "Button" art residency proposal. Told that her work romanticized materials and didn't push boundaries as a professional studio artist, Lenz fought back in the only manner she could. She made art. She also got a 2017 summer art residency at Homestead National Monument in Nebraska where much of the work was created. "I am indebted to the criticism. It forced me to go beyond the scope of my initial proposal. It made me admit that I do romanticize my materials. In fact, I count on the public's nostalgic association with this humble object. There's nothing wrong with this. Also, I do push boundaries, but this time I pushed a lot harder and the effort paid off," says Lenz.
Since her National Park residency, Lenz has continued to use the seemingly insignificant clothing button to communicate issues of gender, race, politics, relationships, and personal narratives. "My work explores the many functions and possibilities of these ordinary objects while challenging viewers to see buttons as more than utilitarian fasteners". Included in this exhibition are several vintage typewriter advertisement and xylene photo transfers of cemetery angels surrounded by hand-stitched buttons. His Secrets and Her Secrets each feature forty, crowd-sourced, close-up snapshots of mouths on which large red and pink buttons are stitched.

 (Above:  This is the fourth section of The Wall of Ancestors.  It is also the secondary entry point for the massive wall and thus includes another framed artist statement in the middle on the far left.  There are eighty-five individual pieces in this section.)

 Now, please scroll down for a few photos from the lower level at the Etherredge Art Center.

 (Above:  Buttons!, including His Secrets and Her Secrets, a button covered vintage typewriter advertisement, and three from the series "The Button as Art", altered antique images from the 1893 Columbian Exposition ... the latter of which I blogged about HERE.)

 (Above:  Buttons!, including The Virgin of Gone and Forgotten plus four pieces from the series Waste Not Fresh Tears ... which were created during my art residency at Homestead National Monument in Nebraska.)

(Above:  Buttons!, including Silence is Golden I and II, four of the Buttons as Art series pieces, and other work.)

I am linking this post to Nina-Marie's "Off the Wall Fridays", a site for sharing fiber arts.

Tuesday, August 14, 2018

Snow White by Night

 (Above:  Detail of Snow White by Night.  Click on any image to enlarge.)

At any one time, I'm working on several pieces.  Generally, I'm also working on different series with different concepts, different materials, and different approaches; but currently, the differences are greater than ever!  I'm working on new pieces for the upcoming Philadelphia Museum of Art Craft Show.  I'm developing proposals for two installations: Loss and The Cocoon. Plus, I'm creating more pieces for a group show called Alternative Storytellers.

 (Above:  Snow White by Night. Framed 51" x 24".)

 This exhibit will feature works by Flavia Lovatelli (paper and recycled material artist), Olga Yukhno (ceramicist), and me.  It will open on March 7, 2019 during First Thursday on Main Street at Anastasia & Friends Art Gallery here in Columbia and run through the month. The show will be part of the Deckle Edge Literary Festival.  My pieces are all twists on common fairy tales.  This one is Snow White.


Creating the piece required careful attention to construction methods.  Stitching through latex is next to impossible.  Mounting velvet is tricky.  So, I cut a piece of plywood and a piece of over-sized foam-centered board to 48" x 21".  I coated the foam-center board with a special water soluble, acid-free fabric glue.  It is formulated in a special way. Once dry, only a little pressure and low heat is needed to activate the glue.  But there was a problem.  The foam-centered board curled up significantly after the glue dried.


So I stapled the foam-centered board to the plywood ... at the very edge ... where I knew the picture frame moulding would cover any bumps in the fabric caused by the staples.


Then, I carefully ironed the velvet in place using a silicone-coated sheet to protect the material.  It worked!  The velvet's nab didn't get crushed.  The velvet was firmly stuck to the foam-centered board.  I used two different pieces of velvet.  The piece at the top has sparkles in the material.


Next, I positioned the latex fetish bustier, latex footwear, the red tights, and the thigh-high fishnets on the velvet.  All these things were donated to me a couple months ago.  The bustier came from DeMask, a specialty shop that was once located in NYC's Bowery district.  (DeMask is still in operation in Amsterdam, Paris, Munich, Dortmund, and Los Angeles.)  To attach them, I used 3/4" copper slating nails ordered from Jamestown Distributors. Not knowing how many I'd need, I ordered two pounds.  There are 403 nails in a pound.  I used all but ten from the first little box.  Still, that's a lot of nails.  The nails went right through the latex and velvet and into the plywood.


If I'd stopped at this point, I would have had a fetish outfit nailed to red velvet.  With the title, a fairy tale is suggested but I really wanted the work itself to communicate the alternate story!  So, I culled through my stash of antique female portraits and settled on this sweet, innocent looking virgin wearing a cross necklace.  Tiny letters were added to read: Snow White by Day.  It went into this ornate silver frame and was glued in place.


I could have stopped there, but I really wanted the work's alternative story to be even more obvious.  So, I sanded the finish on the inner lip of a chunky frame.  I did this because custom picture frame moulding is always sealed in such a way that acrylic paint really doesn't adhere.  With even a short amount of time, it peels away.


Then, I painted that area with red oxide fluid acrylic.  To match the copper nails, copper metallic foiling distressed the flat red oxide paint.


Finally, I collaged the title .... over and over again ... all around the piece ... plus the date and my name at the bottom.

When working on deeply meaningful expressions like my installation Loss (which I blogged HERE), I find balance by making artwork that is not so serious ... like this one!  Alternative Storytellers is going to be a great show and I'm truly having fun making work for my part of it!  My productivity is largely due to the different projects on which I work.  I can't be bogged down in any of them.  They keep me anchored in art and forward momentum!

Saturday, August 11, 2018

Good Meals and How to Prepare Them: A Witch's Guide

 (Above:  Good Meals and How to Prepare Them: A Witch's Guide.  Altered book. 7 1/2" x 5" x 1 1/2" when shut.  Click on any image in this blog post to enlarge.)

Earlier this summer I spent five weeks at the Rensing Center outside Pickens, South Carolina. While there, an idea occurred to me regarding an upcoming group show in which I'm involved.  The group show is called Alternative Storytellers.  It will open on March 7, 2019 during First Thursday on Main Street at Anastasia & Friends Art Gallery here in Columbia and run through the month.  The exhibit will feature works by Flavia Lovatelli (paper and recycled material artist), Olga Yukhno (ceramicist), and me that bring unexpected, female empowered, and thought-provoking new endings to a variety of stories.  The show will be part of the Deckle Edge Literary Festival.  I've been bringing new twists to familiar fairy tales, including Hansel and Gretel.

(Above:  The witch's recipes receiving a coating of wax to prevent the polymer emulsion coated paper from sticking together.)

Early on, I bought several vintage cookbooks at the Pickens County flea market.  One was turned into a piece called Hansel & Gretel's Witch: Hoping for a Michelin Star.  I blogged about it HERE.  I could have stopped there but I had so many more recipes, pages, and ideas ... and the cover of a book called Good Meals and How to Prepare Them.  I couldn't resist the cover!  I added to the title, removed all the pages, lined the interior, and built a "box" from scraps of picture frame moulding cut on its sides.  The interior of the moulding was then painted with a red oxide acrylic.  Hooks and eyes were drilled into place for a tied cord.  (Yes, of course, I zigzag stitched my own cord!)

 (Above:  The altered cookbook when opened and all 39 recipes are neatly inside.)

I had a total blast collaging thirty-nine index cards with some of the recipes originally in the book.  I added words as if a witch's recommendation for changes.  Some of the recipes now read as "how to best prepare a human liver or kidney" etc.  Other recipes are for squirrel, venison, and other things billed as daily fare for a witch (especially one cooking in a Wolf oven).  I converted two icing recipes to very much larger amounts intended to decorate an entire house.  Other recipes included notations on how to entice victims into a witch's kitchen.

(Above:  The altered cookbook when open with several loose recipes.)

On the back of each recipe there's either a simple hex, spell, potion, incantation, or details on how to use a particular herb.  It is amazing how many witchcraft websites there are!  Of course, I wanted the recipes to look as worn and well used as the cookbook's cover.  An old toothbrush was used to sprinkle tiny speckles of black ink.  I dribbled dark blood red spots and sponged on blotches of brown paint.  Finally, a lit candle singed some edges.  All the recipes were then coated with polymer emulsion and allowed to dry.  To prevent the papers from sticking together due to the polymer emulsion, I waxed each side. 

Believe it or not, I still have another cookbook to alter!  I'm already working on it and having so much fun!

Friday, August 10, 2018

Turkish Inspiration

(Above:  Detail of Large Stained Glass LXXXVI.  Click on any image to enlarge.)

I'm really pleased with the way this piece turned out.  I'm also indebted to a hilarious back-story regarding its inspiration. It all started in June at the Rensing Center, an art residency program outside Pickens, South Carolina.  I arrived for five-weeks in order to create a giant, fiber enclosure called The Cocoon.  I brought with me exactly two magazines and placed them beside the double bed.

Of course I meant to read them.  I thought that I'd take the time while alone in this magical, rural setting with no one else around to interrupt me.  In my "normal life", I rarely (if ever) make time for magazines ... and I feel very, very guilty when I toss an entire year's subscription into the recycling bin unread. The only magazines I get are ones that come with a membership.  There are three of them:  Surface Design's  Journal, the American Craft Council's Craft Magazine, and Studio Art Quilt Associates' Journal

(Above:  Large Stained Glass LXXXVI.  Framed 63" x 23". Polyester stretch velvets fused to recycled black industrial felt with free-motion machine stitching and unique melting techniques.)

The magazines sat beside my bed until the next-to-the-last night.  I had just installed The Cocoon in the Rensing Center's library and decided to celebrate with a local IPA in Picken's only craft brew pub while finally reading at least one of the magazines.  I took the SAQA Journal.  It is difficult to describe the surreal moment when turning a page to a full length image of my Large Stained Glass LXXXI beside a nicely written article by N. K. Quan. I was stunned ... happily so ... but have no memory of our obvious correspondence.  (Nevertheless ... THANK YOU, N.K. Quan!)  

(Above:  Detail of Large Stained Glass LXXXVI.)

The article detailed my inspiration as found in a copy of Owen Jones' 1868 copy of Grammar of Ornament.  It mentioned how I changed the Indian design to fit my elongated size and how I ignored the original colors.  It talked about the various motifs and patterns on the page and how I used the ones I liked.  It's a great article!  The piece was later accepted into the prestigious, international juried exhibition Art Quilt Elements

(Above:  Detail of Large Stained Glass LXXXVI.)

While sipping my beer and reading this article, I couldn't help but to think, "Susan, you ought to consult your Grammar of Ornament again!"  So, I did! 


(Above:  My copy of Owen Jones' 1868 edition of The Grammar of Ornament showing the page with the Turkish design)

This time I selected a Turkish design.  I also challenged myself to work in a limited palette similar to the one in the book.  Because my substrata and thread are black, I opted against using more black.  I picked blues and reds with gold and silver for contrast.  When the first layer went down, I thought, "Oh no!  This was a mistake!" but from there, everything went into place.

(Above:  Large Stained Glass LXXXVI stitched, stapled to a stretcher bar, and ready for melting techniques.)

This piece also challenged me to tackle voids in ways I've never done before.  The ornate top and the exotic curve on the bottom required me to create a "spider's web" of stitching.  I wasn't sure how this would come through the melting process ... but like the color challenge, it worked out perfectly!

(Above:  Detail of Large Stained Glass LXXXVI featuring the space inside the curves where I've stitched a "spider's web" between the polyester shapes.)

Even though this is the eighty-sixth piece in this series, there are still new challenges and I look forward to making the next one!


Sunday, August 05, 2018

Loss, a fiber installation

(Above: Loss, a fiber installation.  Click on any image to enlarge.)

Yesterday was magical, truly overwhelming with the widest range of emotions imaginable.  I've been dreaming about this installation for over three years.  Intuitively, found objects were collected. Here and there, a threaded needle was pulled through the antique garments, long running stitches in burnt red wool and masses of Colonial and bullion knots.  Tiny seed stitches now cascade down one, tiny infant's gown.  Many threads were left tangling, as if weeping.  I already had the hundreds of wrapped and tied pieces of lace.  They were leftovers from other projects.  Yet, until yesterday this installation was just a foggy vision.  I didn't even have its title until I'd suspended the work.

(Above:  The photo shoot in the remains of Vista Studios.)

One of the garments was stitched during a winter art residency at PLAYA in the remote Oregon Outback.  The two infant gowns were stitched at Bill Mishoe's auction house while watching the remains of other people's lives being sold.  In the back of my mind, I played with potential names for this installation:  Miscarriage and Estrangement were at the top of the list.  Why? Well, these are personal experiences.  When I suspended the four garments, however, I realized that this was a community of grief.  The work expresses more than my sadness.  It embraces all sorts of motherhood realities:  a stillborn baby, giving up a child for adoption, the "Empty Nest" syndrome, an abortion, infertility, and even death.

(Loss, detail of the four suspended garments.)

This work is flooded in tears, but yesterday did not find me crying.  I was HAPPY ... subtly, quietly, untroubled ... in a state that is best called "bliss".  I had returned to my element, a place in which I am very comfortable.  I went back to the remains of Gallery 80808/Vista Studios.  All the partition walls are now gone.  It is now just a big, empty warehouse with four wonderful skylights over an area that had been an atrium for art exhibitions.  The landlords are looking to sell.  I moved out over two years ago.  My first and former studio (for something like thirteen years) is just a tiny patch of dark blue paint on the massive floor.  In the photo further above, it is the location on the left in which the 8' ladder is standing.


I love this space, especially now that it is empty.  I love the natural light.  None of these picture have been altered except by cropping.  No fancy lighting was required (which is a good thing!  I don't own any!)  It is the perfect place to snap pictures.  While working for three hours, I thought about all the art I've photographed in just this place.  I felt like a pro!  I knew my "foggy vision" was becoming a reality.  From mind to matter to actual installation!  Yesterday was wonderful.


I snapped over two hundred and sixty images.  I culled them down to only a couple dozen.  I shot the installation as a group of four but also ...


... as individually suspended works ...


... including detail images and even a video of how these pieces slowly turn with the air conditioning system.


I shot every garment suspended above all three cradles, one at a time.


I shot various angles, looking up and looking down.


I also shot just one adult sleeping gown with just one infant garment.  Motherhood.  A family friend once said, "Children are closest when a woman is pregnant.  From the moment of birth, a child is not just growing up but growing away."  She couldn't have been more right.  This is Loss, in all its possibilities and for all those women who know exactly how it feels.

I am linking this post to Nina-Marie's "Off the Wall Fridays", a site for sharing fiber arts.

Thursday, August 02, 2018

Rescue Rug

 (Above: Rescue Rug.  Framed 27" x 63". Inventory # 4308. $650.  Click on any image to enlarge.)

I'm usually very good about taking in-progress images. But not this time! Honestly, I didn't think I would end up with anything at all.  It was a long shot at best, a hair-brained idea, an adventure down a "rabbit hole".  It started just over two weeks ago while at Bill Mishoe's Tuesday night "walk-around" auction of used household items.  I go most every week but am not always successful.  In fact, I never even raised my hand to bid that night.  Yet, I saw a pretty hooked rug among the "junk" sitting on a card table.  I don't know who bought this lot, but whoever it was left the rug outside the building in a pile of broken glass and under several pieces of wood that had once been a cheap cabinet.  At least that's where I found the hooked rug the next week.  I picked it up and threw it in the back of my van.

 (Above:  The reverse of the center section.)

The next day, I tossed the rug into my washing machine.  It was filthy after all! Sure, I knew that the wool might felt and the burlap my disintegrate.  Cleaning this hooked rug was a risk, but I had nothing in it.  After an hour, I opened the lid to the washing machine.  It was quite a mess!  The rug was tattered and torn, and the sides of the machine were covered in felted mush.  It took at least fifteen minutes to remove all the debris from the washing machine.  What was left of the rug did not look promising.  I hung the rug outside to dry.  Being dry it did not really improve it, but there was "something" about it that I still liked.
 
 (Above:  Rescue Rug, detail.)

Still having nothing to lose, I started cutting up one corner.  I removed the burlap from the areas that had once been wool ... all the wool that felted into the machine.  I was left with a "fragment" and decided to apply GAC 400, a fabric stiffener.  I applied it liberally on both sides and placed it outside on a piece of silicone coated paper.  Every hour, I flipped it over ... allowing the hot summer sun to work magic on the polymer emulsion.  By the end of the day, the product had dried to an invisible clear and the fragment was nice and stiff.  I showed it to my husband Steve.  He liked it too.  The next day, I cut the rest of the rug into two, slightly larger fragments and applied GAC 400 to them too.

 (Above:  Rescue Rug, left side of the piece.)

Soon, Steve and I were talking about how we'd like to frame it.  Amazingly, I had a bolt of cheap, synthetic upholstery fabric in the perfect golden color.  (It came from Bill Mishoe's auction several months ago and set me back a whole six-dollars for the entire bolt!)  I mounted the fabric on an over-sized piece of foam-centered board cut to 20" x 60".  We ordered a chunky, deep brown moulding with a unique inner lip.

(Above:  Picture frame moulding from Decor's Cappuccino line.)

The face of this moulding is a full half-inch higher than where the artwork is placed.  What does that mean? Well ...


(Above:  Upper left corner of the frame.)

... this is the depth that is created.  Because the upholstery material and the piece require no glass, I didn't put glass into the frame.  Yet, the artwork isn't "sticking out" in front of the moulding.  It is "set back" as if in a shadowbox.  The piece looks amazing!  It reminds me of fragments of Roman mosaics.  I thought I would title it was some historic reference, but Steve and our moulding rep both said, "Call it Rescue Rug!"

 (Above:  Rescue Rug, right side of piece.)

Actually, this is an appropriate name.  Not only was it rescued from the side of an auction house, but it was also the result of recycling when initially created.  This hooked rug wasn't made from just one type of material. It appears to have been made from strips of old clothing or household textiles.  Some of the fabric is cotton, but not all the cotton seems the same weight or weave (or some might be a heavier linen).  The rusty red fabric seems to be a more densely woven wool blend ... which is why it didn't completely felt onto the sides of my washing machine.  From the looks of it, this was a "recycling" or "rescue" project from the start!   

(Above:  Rescue Rug ... how it looked sitting outside my back door for its photo shoot.)

Had I known that this hair-brained idea would turn out this well, I would have taken "in process" photos ... but I would have never guessed that the rescue would be so successful!

I am linking this post to Nina-Marie's "Off the Wall Fridays", a site for sharing fiber arts. 

Wednesday, August 01, 2018

Large Stained Glass LXXXV

 (Above:  Detail of Large Stained Glass LXXXV.  Click on any image to enlarge.)

I finished Large Stained Glass LXXXV last Saturday.  My husband Steve came into the garage just at the perfect moment to capture still images and a couple videos of the final melting steps.  I posted these to Facebook and got lots and lots of positive feedback.  Yet, I couldn't take final pictures for my blog until today.

 (Above:  One of Steve's photos from the melting stage of melting.)

Until this morning, I've been waiting for my weekly delivery of mat board and moulding.  Pieces this size have to be stitched to over-sized mat board in order for me to photograph.  So ... here it is:

 (Above:  Large Stained Glass LXXXV.)

Large Stained Glass LXXXV measures 56" x 16" unframed and is 63" x 23" framed.  It was created from layers of polyester stretch velvet fused to recycled, black industrial packaging felt.  Free-motion machine stitching is done using only 100% cotton thread.  Then comes the FUN part ... melting!

 (Above:  Detail of the top of Large Stained Glass LXXXV.)

I first spent hours melting holes through the fabric using three different sizes of soldering irons.  Because all the layers are made from synthetic material, the heat from the soldering iron just melts straight through.  Then, I flip on my industrial heat gun and aim toward the space between the polyester velvet shapes.  This is the "thinnest layer".  It is simply the industrial felt ... also a synthetic.  It is often difficult to explain this in words which is why THIS VIDEO is helpful.  

 (Above:  Detail of the "rose window" portion of Large Stained Glass LXXXV.)

Want more of the melting process? CLICK HERE for a continuation of the melting!  Please notice that I am wearing a carbon filtering ventilator mask.  The fumes from melting polyesters is toxic.  

 (Above:  Another detail of Large Stained Glass LXXXV.)

The success of my work is based on the fact that synthetic materials melt and natural materials don't melt.  Each of my works is stitched using only 100% cotton thread.  The cotton thread doesn't melt.  It stays and holds the various shapes together!


Here are some of the still images that Steve took in the garage.  Generally, I melt from the reverse.


I hold the heat gun rather close to the packaging felt and aim for the space between the shapes.


The final step is using one of the soldering irons to release the piece from the stretcher bars.  I always have my work stapled to stretcher bars because the melting process would otherwise shrink the artwork!